Welcome to my blog! Read about photography, film photography in 35mm, medium, and large formats, pinhole photography, about darkroom printing, alternative photographic processes, and more. Thank you for visiting!
Indoor Projects - Take Notes
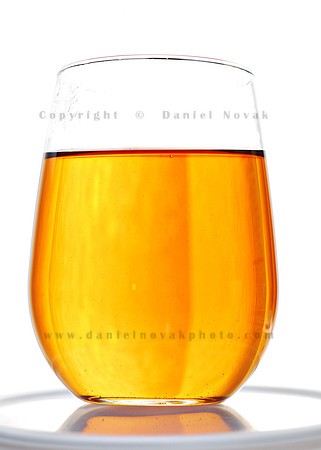
 A while back (about two years), I took the photo of a glass full of tea you see on the left here. It took some serious trial and error to get the lighting just right so that the white area would be completely white and the tea properly exposed. I also got the vertical bands of light and shadow, which I liked since if feels like it adds depth to the photo, making the glass more 3D.
However, the top of the glass was moist from condensation caused by the hot tea and the glass was sitting on a lid on a plastic bowl. I wanted to reshoot this scene and get the glass better prepped up and fully on white without any visible support underneath.
Easy, right? Just remove the bowl, make sure there is no condensation on the glass, set the lights the same way as two years ago, and click away!
Hmm, how did I have the lights set up two years ago? How did I shape the background? How did I make sure there were no errant reflections in the glass that is curved not only horizontally but vertically too, thus picking reflections not only from more than 180 degrees wide but also up from above and below? You think I took notes two years ago? You think I took a photo of my set up back then? No, why, I'd remember.
I did not remember.
After about two hours of fiddling with white and black paper, two external flash units, various supports, and more, I got the second photo in this post.
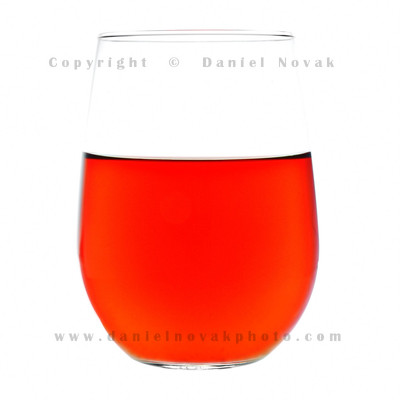
Let me admit right here, product photos on white background don't seem to fit my black background theme too well. As far as the glass of tea goes though, I achieved what I set to - a uniform white background all around with no visible stand or shadows, all of that straight out of camera with no post-processing, and the top of the glass with no condensation. What I could not repeat though were the vertical bands I really liked in my first photo!
No, I am not giving up and will try again. But this time, once I get it right, I will surely take notes or photograph the set up, which may be the best way to keep the notes along with the photos.
White today's camera's make it really easy to note the exposure and a million other settings, the camera still can't track what it does not know about.
Take notes and have fun!
Adapt, aka Plan but Welcome the Random
I've started this blog with this theme with my Plan but Welcome the Random post. And it just proved so true again. One day I went to a local park just for a walk with minimum equipment. Pretty much just the camera. And towards the end of the walk I found a pond partially covered with beautiful algae patterns. not a solid ugly green layer but these truly beautiful patterns! It was late in the day and while the back light worked nicely for the algae itself, it created a lot of glare on the open spots of water. So I planned to come back with a tripod and on a cloudy day. Cloudy day to do away with the glare, and a tripod to be able to stop down the lens and get a lot of depth of field to cover the whole frame at 200mm and a 45 degree angle.
Couple days later I was back as planned. An overcast sky, nice even light. But wait a minute! Where are my patterns?!? The overnight downpour and wind completely changed the surface of the pond and my beautiful patterns were replaced with the solid layer that I did not care for much. So what now? Leave?
No. Instead, I framed the pond with a somewhat wider view, got in some foreground grass, the water, and trees across the lake. I liked the clouds too but they were a bit on the brighter side compared to the lake and ground. Color was also lacking from the whole scene. I pulled out the Cokin Yellow Blue Varicolor Polarizer and added the colors back in. To make the clouds stand out even further I also used a 3-stop Cokin Graduated Neutral Density filter over the sky (both filters were in the Cokin P Filter Holder attached using the 72mm adapter ).
With this set up, I got some still shots in that looked like nothing I had from this park before and then I also activated the interval timer on my camera and let it clock away for almost half an hour every 5 seconds with the intention of trying a time lapse video since I had not taken one in a very long time. i ended up with 343 photos.
I am not sure how people do this frequently, let alone doing HD video. Just here, I had 3.3GB in the RAW files resulting in 0.5GB of exported 1920 x 1080 JPG files. All of that for 11 seconds and 30MB of the final product.
Anyway, back to the original theme. As you cans see the plan did not work out at all but it was a great opportunity to try different tools and different techniques. I had fun and am sure the practice will come handy on an occasion that will be perfect for the filters or for time lapse.
Have fun!
Stuck in a low ISO Groove
 Lately, I've been shooting a lot of long exposures, blue hour shots, lots of photos with low light and expansive areas of smooth color transitions in the sky, water, and the likes. As such, the only ISO my camera knew was 100. With anything over that, the noise becomes rather significant (on my camera).
The other day, I was in a local park with lots of small ponds. I didn't see any turtles on this visit, just lots of frogs jumping out of my way, and some birds. But at the end of the walk one of the ponds had a small area by the shore filled with algae. But it was not that boring solid layer of algae but rather a beautiful array of small algae patches and patterns. Not sure how the gaps happened but they were there and it looked beautiful.
By this time, it was rather late and light was low. Beautifully warm light from a low angle, but very little of it. For the photo on the right, I was at 200mm on my lens with a crop factor of 1.5, i.e. a full-frame equivalent of 300mm. Yet, all I could pull was f/7.1 at 1/45 sec. f/7.1 definitely did not provide sufficient depth of field for the whole frame since I was at a rather sharp angle to the water surface. And 1/45 sec. definitely did not provide enough motion stopping power. Even with the stabilization of the lens turned on, maybe the 1/45 was as stable as 1/200 sec. Maybe. But I was still at 300mm focal length, so 1/300 sec or faster would be ideal (without stabilization).
It was at this point that I took a few shots as a future reference and decided to come back another day with a tripod to be able to go to f/22 and mirror lockup.
Why did I not go to ISO 200, or 400? Not sure, I must admit. I attribute it to the strong habits I formed lately not to go past ISO 100. But would it have mattered for this scene? I doubt so. With so much texture, any little bit of noise would have easily disappeared. And 2 stops would have allowed be to add 1 to the f-stop and one to the shutter speed, better freezing the camera shake and providing a bit more depth of field. And I would have had a better photo right then and there.
Needless to say, when I returned two days later with my tripod handy and with cloudy skies to limit the glare off the water between the patches of algae, I did not find the pond as I wanted to. The overnight rain and wind pushed the algae together and it was the boring ugly solid layer of green slime. So, I still need to go back to get my sot, if it ever happens again. I think I've learned something though. The rules change based on the situation. While ISO 400 may not be a good idea with an expansive sky, it may be just fine with lots of texture.
Have fun!
8" x 10" Prints on Sale at the Adorama Lab
The Adorama Lab is offering 8"x10" photo prints (glossy, matte, lustre) for $1.00 through May 23, 2012. Metallic prints are $1.25. If you have not tried those, they're pretty cool for photos with a lot of detail.
Full Moon Names - The Farmers' Almanac
I bet you've all heard the name "Harvest Moon", which happens in October. But that is not the only full moon that has a special name. Based on the Farmers' Almanac, they all have a name, and most of them several.
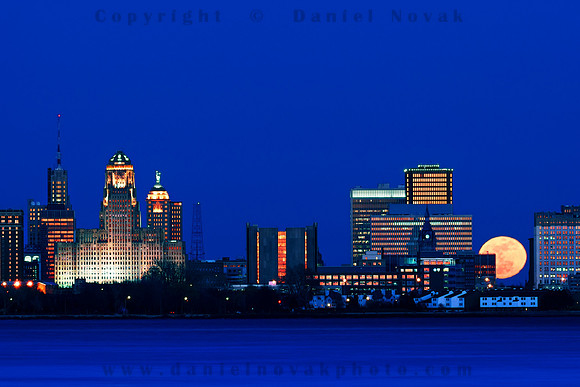
So this full moon that assumed a position in the middle of the skyline of Buffalo, NY was Full Pink Moon. But it could also be the Full Sprouting Grass Moon, the Egg Moon, or even the Full Fish Moon!