
Welcome to my blog! Read about photography, film photography in 35mm, medium, and large formats, pinhole photography, about darkroom printing, alternative photographic processes, and more. Thank you for visiting!
Weather Forecasting for Photography

 This is a follow up to my last post. I mentioned how weather forecast can help with getting the photos you want. It can mean the difference between getting up early and ending up in a place that looks great but not like what you wanted. Many times, doing the photo op a day or two sooner or later can make a huge difference.
I wanted to photograph morning frost a day earlier but the hourly forecast showed high 30s for the morning. And rain! A day later? High 20s and clear skies!
That is how I ended up in the right place at the right time and had a chance to photograph the frost I wanted. Humidity was not high enough so the frost was not as prevalent as I hoped for, but there was enough of it to have fun. And the clear skies sure beat the rain from the day before.
While national weather forecast may be great I prefer the forecast from a local TV station.

If you're from the Buffalo area or Western New York, I do recommend the smart phone app from Channel 2, WGRZ's Storm Team. For sunrise and sunset times, I like just straight Google, something like Buffalo Sunrise time. The sunrise time comes up above all of the searches. Nifty. Unfortunately, their mobile version does not do that, bummer. For sun and moonrise and set positions, The Photographer's Ephemeris is great. And for fog? Just Google something like Central New York Fog Forecast replacing Central New York with your own region. Or start with this national web site for fog forecast.
Use the tools at your disposal to have even more fun!
Fall Sunrise at Birdsong Park
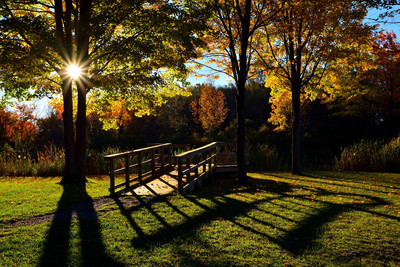 I've been actually using weather forecast lately to see when it might be most worth getting up early. For my previous trip to Letchworth State Park, high humidity and low temperatures were promising for valley fog over the Genesee River. Checking some fog forecasting sites confirmed there was a chance. And sure enough, it was there.
For this morning, I was hoping the freezing temperatures would provide some nice frosty coating on the ground that would contrast the colorful fall foliage. Clear skies were also promising unobstructed views of the sunrise, which I did not get back at Letchworth. So I headed to Birdsong Park and Nature Preserve to check out the ponds there.
For the most park, I got what I came for. The frost was not as strong as expected but enough to have fun with it (not in this photo) and the rising sun provided beautiful backlight for the colorful leaves. And here, it also created nice shadows from the twin tree and the boardwalk railing. And of course, there was plenty of fresh air to enjoy!
Use the Internet resources to your advantage, or some of the many smart phone apps available to forecast weather by hour, to show sun and moon positions, to help with estimating chances for fog, and more.
And while on location, have fun!
Polarizer for the Fall - Saturated Colors of Foliage and Other Surfaces
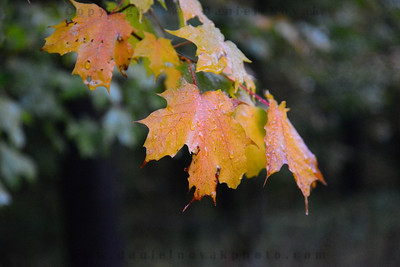
Many people use polarizers to darken blue skies and make white clouds pop. When the sky gets covered by heavy clouds, the polarizer stays home, or in the photo bag. While the polarizing filter is not of much use for the overcast sky itself it can still help with what lies below.
The colorful fall foliage is the prime candidate! Overcast rainy days are actually great for capturing the wild natural colors. That is as long as you can eliminate all of the glare from the diffused light bounding all over. And that is where a polarizer can be invaluable.
In this first photo, no polarizer was used for the close up of some colorful maple leaves in the rain. Yes, some color is there and it stands out well from the green leaves behind, however, there is a very easy way to get so much more out of a scene like this.
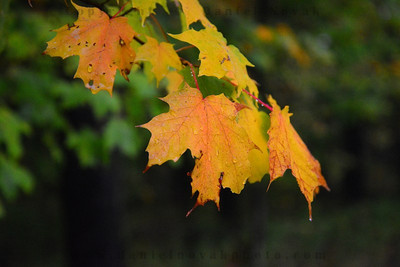
Just look at the second photo. The only difference is that a polarizer was in place and rotated for maximum polarization, all else remained unchanged. And you can see that not only did the foreground yellow and orange colors come to life, so did the background green leaves, previously obliterated by glare.
Many things can be tweaked and improved in post-production but this sure is not one of them. Once the color and detail are gone they are gone. Plus, it takes 1 minute in the field and it's all set, no need to sit behind the computer. Instead, you can be out there enjoying the outdoors and capturing more photos.
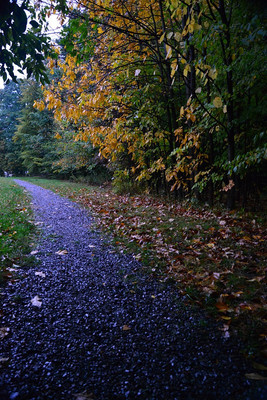 For a full disclosure, these photos are almost straight out of the camera to show the polarized effect without interference from post-processing. I have only scaled them down and applied sharpening, absolutely no changes to exposure or colors.
In the second pair of photos, the same difference. The first photo without a polarizer has glare not only on the leaves top right but also on the gravel on the path. You can see a dramatic difference in color between the two.
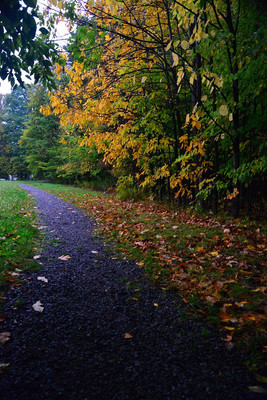
This one is more interesting though in my opinion. While the foliage clearly wins in the second polarized version, I think the gravel path is a whole different story. That one, I think, depends on one's taste and what the photo tried to communicate.
Whats the moral of the second comparison? While polarizers generally help, sometimes, they may not be the right tool. If it is the glare that caught your attention in the first place, polarizer is not what you want mounted on your lens.
Just search for "circular polarizer 72 mm" and replace the 72 with the size of your filter threads. I have had a very good experience with Hoya filters, including their polarizing filter.
Circular polarizing filters usually absorb about 2 - 2.5 stops of light. So white they help with eliminating glare and saturating colors they will slow down your shutter or demand higher ISO. Some people like them for that since they can serve a double duty as a polarizer and a neutral density filter in one. Very handy for flowing water or waterfalls.
If that is not what you are after though, especially if shooting moving subjects you want in clear focus, the Hoya HRT circular polarizer may be the right choice since is passes a notch more light through (about 1/3 of a stop)
Have fun with the colorful season!
It's the season of color - Letchworth is getting very colorful!
 This one is mostly for the local crowd. If you're from Central New York or around, you really do not have a reason to wait any longer. Sure, each area is a little different but colors are plentiful all around. Some higher elevations are actually approaching their peak while others still have a little bit to go.
In the Letchworth State Park, there are still quite a few greens around but I actually like it that way. The colors have something to contrast with. When it all turns orange and red, all trees blend together too much in my opinion.
Also, this was a very dry summer. Even though the September rains are helping quite a bit it is still dry and leaves fall quick. So who knows how many leaves will be left up on trees when the would-be peak comes.
In this photo you can see the Genesee River gorge in early morning. Humidity was at 98% and the gorge filled up with a beautiful layer of fog that kept flowing above the river becoming denser and thinner at times, making each photo different second by second.
If you do visit the park this weekend (October 6, 7), beware, the Arts and Crafts Festival is taking place there. If that is not what you are going there for I would recommend staying away from the northern entrances.
Have fun leaf peeping!
Transitioning to Full Frame, Depth of Field
I've read the theory many times. A smaller sensor has bigger depth of field. That is why most of the tiny sensor compacts show everything from near to far in focus, including all of the camera phones. Four thirds have a bit less depth of field, APS-C further reduces it, and full frame takes in another notch further.

Even if you are looking at this photo at a rather reduced size you can probably see that the trees across the pond are not in focus. Looking on a large monitor, let alone at 100%, clearly reveals depth of field issues. To illustrate that here, I circled two areas that I am adding 100% crops for.
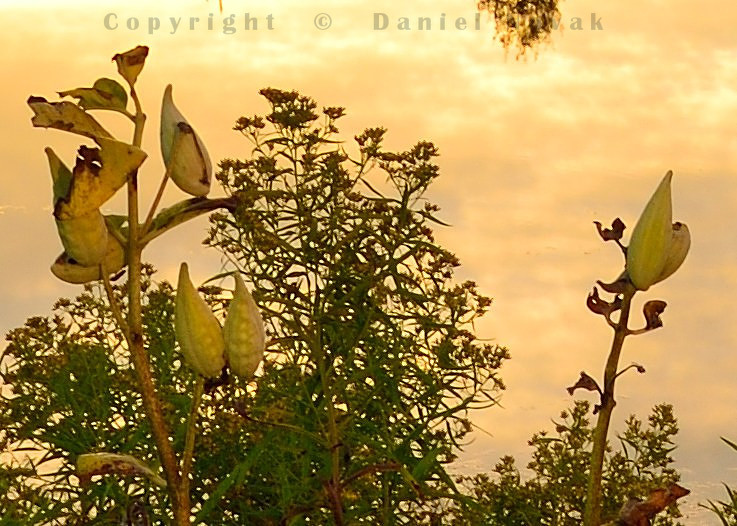
Foreground plants
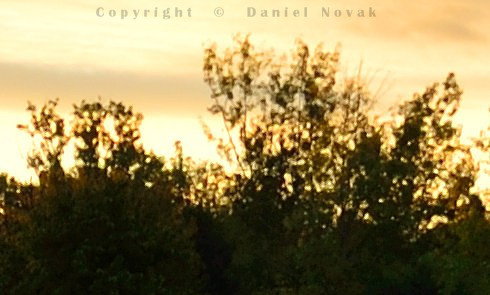
Background trees
I have been shooting with an APC-C sized Nikon D200 (DX designation on Nikon cameras) for many years and learned that I would have gotten away with my settings here. The foreground plants were at about 6 feet. I selected F/11 and focused on the plants. I could have focused at the hyperfocal distance, or at least slightly past the plants, maybe on their back row. But I did not. Over the years I got used to the APS-C sized sensor providing enough depth of field in these situations.
After I realized my mistake I used DOFMaster (there's also an iOS DOFMaster App, or you can use the free alternative Simple DoF) to find out how far off I really was. So here's the scoop.
Full Frame (FX on Nikon):
- 28 mm lens - f/11 - focused to 6 ft: DOF range 3.37 ft - 27.2 ft
Wow! Under 30 feet for the far distance! My guess would be that the background trees were about 150 feet far. Not even close to the 30! Looking at the additional information from Simple DoF reveals that just a slight adjustment could have easily resolved the situation, had I realized the need.
- Hyperfocal distance 7.67 ft: DOF range 3.84 ft - infinity
Focusing just a foot and a half past the plants would have provided depth of field to infinity and kept the plants in acceptable focus at the same time. Another alternative would have been stopping down to F/16.
- Alternative with 6 ft focus: F/16: DOF range 2.85 ft - intinity
Below is the data showing what I was used to on the smaller sensor of the D200.
APC-C (DX on Nikon):
- 18.6 mm lens (18.6 mm on APS-C is 28 mm on FX) - F/11 - focused to 6 ft: DOF range 2.16 ft - infinity
- Hyperfocal distane 3.41 ft: 1.7 ft - infinity
As you can see, 6 feet were actually past the hyperfocal distance on APS-C and even a closer focus would still result in enough DOF to extend to infinity.
It's time so construct some new charts for myself and get used to more distant hyperfocal distances, stopping down more, or using wider lenses with greater DOF.
Have fun focusing!