
Welcome to my blog! Read about photography, film photography in 35mm, medium, and large formats, pinhole photography, about darkroom printing, alternative photographic processes, and more. Thank you for visiting!
Indoor Photo Project - Water Gone Wild, Vividly and Colorfully Wild
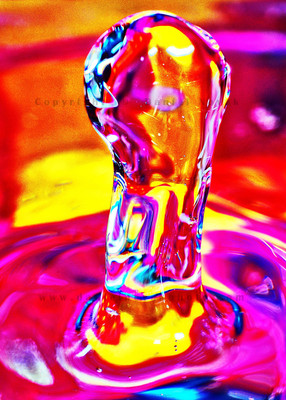
 I've seen these on various photo sharing sites, blogs, and other internet places. However, I've never tried to get one of my own, that is until now. Somehow, Bryan Peterson's video finally pushed me over to get the set up ready and do it! On that topic, you can sign up for Bryan's newsletter with lots of creative ideas at the PPSOP (look for a link at the bottom). He now also works with Adorama and the tips are also featured there.
I've pretty much followed what you can see in the video. I have not used a macro lens but rather a 50 mm prime on a 24 mm Kenko extension tube. I also changed my lighting set up. Instead of two flash units from the front left and right I used cross lighting with one from front right and one from back left. I was not sure how it would work with water but under other circumstances I like how the backlight creates a nice rim light around the subject. Here, I was hoping it would highlight the transparent quality of the water droplet.
I also tried both flashes from the back, but that did not provide enough light on the background and the colors were too dark and without saturation, so I moved the right flash back to the front.
I did not use two bowls, one on top of another. I used only one and filled it up almost to the top. That way, the background was nicely clear. Initially, I was tempted to try to go for a low angle, almost horizontal, but the visible water line bothered me so I raised the camera to shoot through the water and the bowl's bottom.
Both the camera and my flashes were set to manual. I went for 1/250th of a second for shutter speed to kill the ambient light and to allow me handheld shooting. I varied my aperture between f/5.6 and f/11 trying to get as much of the water bounce in focus while keeping the background out of focus, which was not that easy since it was only about 3 inches behind the action. The flashes were fired wirelessly using the Nikon lighting system both in manual varying between 1/16 and 1/64 power. In this photo the front right was at 1/16 and the left back was at 1/32. Both were my SB-600s zoomed fully out to 85 mm.
Oh, and as far as processing goes, I did not use my normal SW. Instead, this was processed in VIveza 2, now from the Nik Collection by Google.
Have fun with your indoor photo project!
- Nikon D200 (my D600 is still with Nikon for cleaning)
- Nikkor 50mm f/1.8 (or the newer AF-S version)
- Kenko extension tube set
- 2 x SB-600 (now replaced with Nikon SB-700)
- Colorful fleece
- Glass bowl, sink, and dipping water
Using my links to buy your equipment keeps me going and costs you nothing. You can also use the Amazon search box in bottom left for anything not mentioned here. Thank you!
My previous Indoor Projects:
Buffalo City Hall without Shadows

Buffalo City Hall is one of those architectural wonders that calls me back often. At sunrise, it's illuminated by the warm rays of the rising sun. However, those rays also cast shadows across the building's face. While that makes the texture of the building stand out, the left wing also casts a shadow across the center of the building. This particular morning there was no sun and no rays. The overcast sky kept the light diffuse, allowing me to capture the building differently, literally in different light.
One thing to note though, even on a day like this the diffused light is still directional. While the sky looks featureless here, it did not get blown out and stayed within the dynamic range of the sensor. In the evening, with the light coming from behind, the situation would have been different and the strong backlight would require a strong overexposure of the sky. The details in the building would have been more difficult to capture. Alternatively, some color might find its way through even the thickest clouds giving the whole scene a whole different mood.
Have fun exploring different light!
The Agave Chiaroscuro
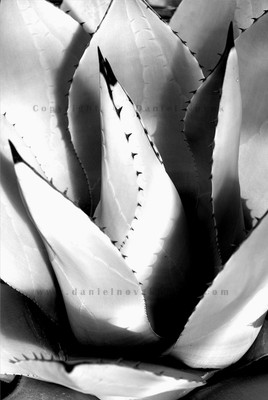 The leaves of agave, and the century plant, as some of the agave species are called, have always fascinated me. The regular arrangement of so many leaves providing an endless number of photographs. Even tiny changes in the camera position can result in completely different photographs. One can get close or step back, us a long or short focal length, shoot from above, horizontally, or even looking up. There are just so many ways to get the leaves arranged in the frame.
On this particular occasion, the curves of the leaves were just part of what caught my eye, The plant was brightly lit from the side and the leaves cast beautiful shadows on the plant, resulting in a high contrast scene with some parts flooded with light and others in almost full darkness. A double win for my eyes, the fine curves combined with the exquisite light.
This photo also reminds me of the book I'm reading now, Mastering Photographic Composition, Creativity, and Personal style by Alain Briot. In all honesty, the first two chapters did not excite me at all and I started having doubts about the whole book. The author tried to justify the existence of photographers, and how little they are appreciated for their skills and art as opposed to just owning fancy camera equipment. While all true I was not sure about the value, especially since the book is for photographers who most likely already know all of that anyway.
Chapter 3 fell short of my expectations too. With Section B / Chapter 4, Composing with Light, it's finally getting more exciting and I am getting sucked back into the book to read more. I think there is a very good chance now that I will finish the book and will be able to share what value I end up getting out of this one. Anyway,this long chapter does explore the various qualities of light and does discuss chiaroscuro too. That's how my original The Curves of Agave became The Agave Chiaroscuro for this blog post.
Have fun exploring light, it's not just about the sunrises and sunsets!
Revisiting Locations & The Unplanned
 I've had posts on both topics in the past.
The first one is revisiting locations. There is such a variety one can get in the same place! Different season, different time of the day, different weather, or just simply noticing different and new things on repeated visits. That is what is great about locations close to home. One can return many times and explore the locations' changing faces.
The second one is allowing for the unplanned to take over. While I like to plan where to go and what to focus on, where the sun or moon are going to be, how the light will look, whether there is a chance for fog, and more, I also feel it is essential to let go of these once on location and allow for a healthy dose of spontaneity.
Both came together here, even though in a different location. I planned for and went to take sunrise photographs of the Buffalo History Museum. It was a great start of a new day and I was quite happy with what I had experienced and captured.
Then, on my way back home I drove by the Outer Harbor and saw that the ice was not completely gone yet despite the already warmer weather. These gorgeous looking islands of ice were floating around between the break wall and the shore. Despite already running late and having other plans I could not resist! Who knows, one warm day and it could all be gone!! And I am so glad I did. The ice looked great against the blue water. And the sunshine of early morning was bathing the whole scene in some great warm light!
Now, the Bell slip apparently plays an important natural role. You can click into the photo to read a bit more about it there or refer to the first link below.
Look out for the surprises and have fun capturing them!
References and further reading:
- NFTA: Niagara River Greenway Commission Project Consultation and Review, Outer Harbor Bell Slip Stabilization Project
- Environment NEws Service, Buffalo's Ugly Waterfront Brownfield Becomes a Greenway
- Corridor Ecology via Buffalo, Waterfront spatial typologies and the adaptive design in the Outer Harbor Landfill, Buffalo, New York
Sensor dirt and cleaning
Ever since I replaced my DX format D200 with the FX D600 I have struggled with sensor dust. SInce the D200 did not have sensor cleaning built in and the D600 does I had high expectations for an improvement, despite not really having much of a trouble with the D200. The opposite became reality. Right from the get go, there were a few spots in two corners that would not blow away even with the Rocket Blower. And over time, it certainly was not getting better.
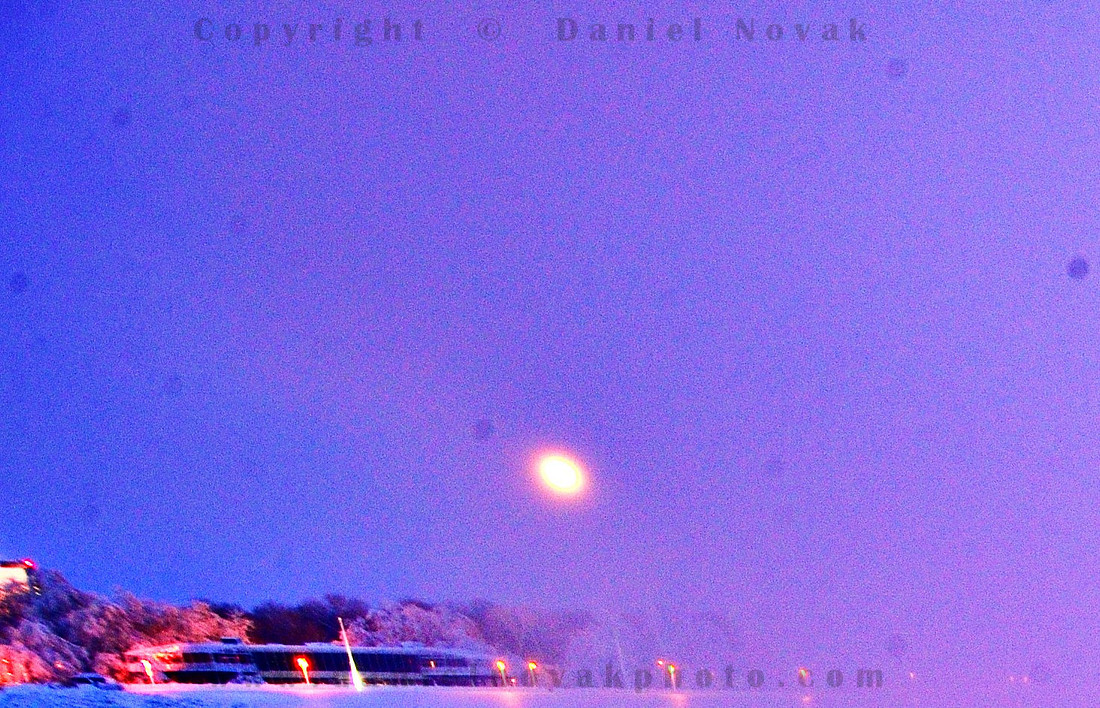
Eventually, backlit photos at f/22 became so bad that I needed to take an action. See this 100% crop from a blue hour photo and that is just a tiny fraction of the photo that suffered similarly throughout. To make the dust spots more obvious, I used curves to crank up the contrast and also a high pass filter with a radius of 75 (thus the high overall noise at this long exposure).
My last home cleaning of the D200 did not go too well and I ended up shipping the camera to Nikon. I believe it cost about $125, the results were outstanding, and they even threw in a new LCD protector, new grip, and a few other things. Still, not the cheapest thing. Knowing this would not be the last time the D600 would need cleaning I looked into at home cleaning options first, reasoning I could always send it in should I make things even worse.
After researching several dry and wet cleaning options I decided to try the Visible Dust wet cleaning KIT with VD Plus liquid. Part of the decision not to go with a dry solution was the fact that even my trusty large Giottos Air Blaster failed to dislodge the dust. I was not entirely sure about the source of the spots either since I could not see them on the sensor, only in the photos. Was it really just dust? Was it possible that moisture got in and created spots as it dried? Or were they really oil spots as reported on the Internet, originating from within the camera? So I bought the wet cleaning KIT with 4 swabs and cleaning liquid.
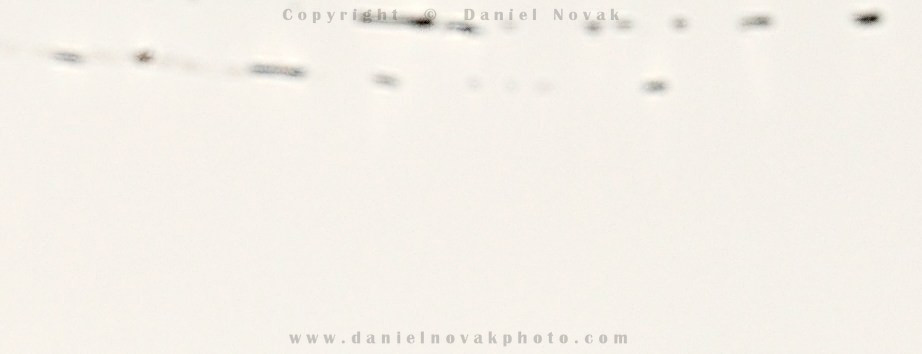 What you see above is the outcome of my 1st cleaning pass. While the number of spots on the sensor went significantly down, I had these terrible streaks along both edges. Not too encouraging, but fortunately I had read some reviews before and knew there was a good chance of this happening if too much liquid is put on the swab.
I reached for swab #2 and ran it across the sensor a few more times, taking test shots after each. By cleaning #5 I thought my camera was usable again but I was not happy with the results just yet. After a break for the night, another cleaning day came.
Let's make the story short and to the point. How does it end? I would love to tell you all how I perfected my technique and how you should all buy this or another wet cleaning kit but the reality is that despite some decent results, I just could not get it right. The camera is packed and is heading to Nikon tomorrow. Let's see what they can do. I will report back later. I also hope that the gloom and doom reports on the Internet are not true and I will not have to do this every other month. That would be a shame and a pretty pricey deal.
My trusty D200 was called back into active duty, let's have fun with it - it had served me extremely well for about 6 years and it looks like it can't retire anytime soon.