
Welcome to my blog! Read about photography, film photography in 35mm, medium, and large formats, pinhole photography, about darkroom printing, alternative photographic processes, and more. Thank you for visiting!
Film Pinhole Photography
Previously on pinhole photography: A New Chapter, a New Book - Pinhole Photography
 Canalside, Buffalo, NYZero Image Pinhole, Fuji Neopan 100 Acros
 It was obvious this was coming, wasn't it? I have shared my move back into film black and white photography and I have shared my excitement about digital pinhole photography. So today, those two interests merge and I have the first two images to share, and a few more if you click through to visit the Pinhole Gallery on timelessbuffalo.com.
So back in downtown Buffalo we are on a warm and sunny winter day. No obvious signs of winter, clear skies, a gorgeous day for a long walk through the city in search of locations to point the pinhole camera at. On one hand, I was curious how familiar locations would look photographed with a pinhole camera, on the other, I wanted something altogether new. In the end, I must have walked quite a few miles up and down mostly Main, Franklin, and Pearl Streets.
For metering, I downloaded a new app for my iPhone (Light Meter Wheel by David Quiles). The old one I had was very limited in available shutter speeds and even more in the selection of f-stops. The pinhole in the Zero Image camera is extremely tiny though resulting in an f/138. The new app does not have such tight arbitrary limits and as such works really well for both regular cameras as well as pinhole.
 Buckn' Buffalo, Buffalo, NYZero Image Pinhole, Fuji Neopan 100 Acros
The first photo is from Buffalo's Canalside, one of my favorite waterfront locations, however, from a new angle to get something new.
The second photograph takes us to Franklin Street where the classic saloon look of Buckin' Buffalo seemed to fit the pinhole camera capture perfectly.
Enjoy the beauty that surrounds you (#etbtsy)!
Do you enjoy reading my photography blog? Would you like to get more special content from me reserved for the subscribers to my quarterly newsletter? Please, register by creating an account on my website - just follow the Login link at the top of the page. Would you like to see more black and white photographs from Buffalo, NY? Visit Timeless Buffalo and enjoy! It has galleries with black and white digital, film, and pinhole photography. Please, let me know if you have any questions about any photo products offered, or not offered, I will be happy to help!
Using my links to do your shopping keeps me sharing more photographs and writing the stories behind them and costs you nothing. You can also use the Amazon search box in bottom left for anything not mentioned here. I truly appreciate each purchase, no matter how large, no matter how small. Thank you!
A Stroll through Moravian Countryside
Previously from the Czech Republic: A Stroll through Moravian Countryside, Sunset Stroll through Southern Moravian Countryside, Rolling Hills and Poppy Fields, There are as many pubs as there are poppy seeds ..., More Travel Treasures, Drying Garlic, Treasures of Travels, The Power of Simplicity (of the iPhone), Take Me Home, Country Road ..., Sound of Music Induced Moment of Nostalgia, Travel in Space & Time.
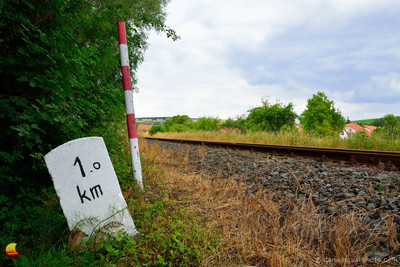 1.0 km Railroad MarkerSouthern Moravia, Czech Republic
After missing a beat or two with the blog I'm going to completely change the pace today and share a special moment from the past with you. It was summer almost two years ago and I was enjoying a photo walk around the village of Nemotice in Southern Moravia, Czech Republic in Central Europe. Everything was perfect. With the help of the photographs, I can still remember it almost like it happened yesterday. Not too hot for summer, with clouds adding drama in the sky, fresh air in unlimited doses, all playing into a nice walk full of contemplation and some photography.
If you have been following my blog and photography for a while you know I like trains and railroad tracks and including them in my landscape photographs. The tracks I followed for a while this particular afternoon are barely used any more. Over the last 15 years, it went from two trains a day to one or two trains a year on special occasions.
When I came upon this beautiful marker (I was going to say mile marker but I guess it can't be a mile marker if it is in kilometers, can it?) I knew it was a photo stop. I liked just about everything about it. The clean bright white color was definitely stealing attention, the tilt was great, and once I found this perspective I liked how everything lined up. A railroad passing through rural landscape, with the typical terra-cotta red roofs hinting at the village presence in the background, and a nice cloudy sky to complement the mood. Quiet, contemplative.
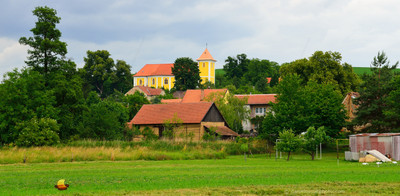 Village ChurchSouthern Moravia, Czech Republic
A few moments later a view opened up that I could not resist. Kind of a back stage view of the village, not from the main road where most passer-bys drive but from behind, showing so many clues about a village life. Just let your eyes wander about the photo and see what you can spot and what your interpretation would be. Yet at the same time, it is a very simple photo.
At first, I was not sure about my framing. Where should my sides start and end? How much should I include? I did my usual dance moving a bit forward and back and sideways and trying to compare an eye level view with a lower perspective. I also worked the zoom. It's always important to do both in my opinion. Zoom can help with framing and deciding what to leave in and what to leave out, however, it does not change the perspective. For that, old fashioned moving around is necessary. Then, it all came together in this simple scene that felt just right, the edges clean, and when I look at it now with a lot of time in between I can still remember the moment so well. No breeze and smell coming out of the photo though, for that, past experience and imagination have to be engaged.
All things have to come to an end, and for me, the ending could not have been much better. To complete the walk and today's post I came upon this beautiful traditional village house from just the right angle. Unlike the dance above, here, I knew I did not want to move anywhere. I wanted to capture the scene exactly as I first saw it.
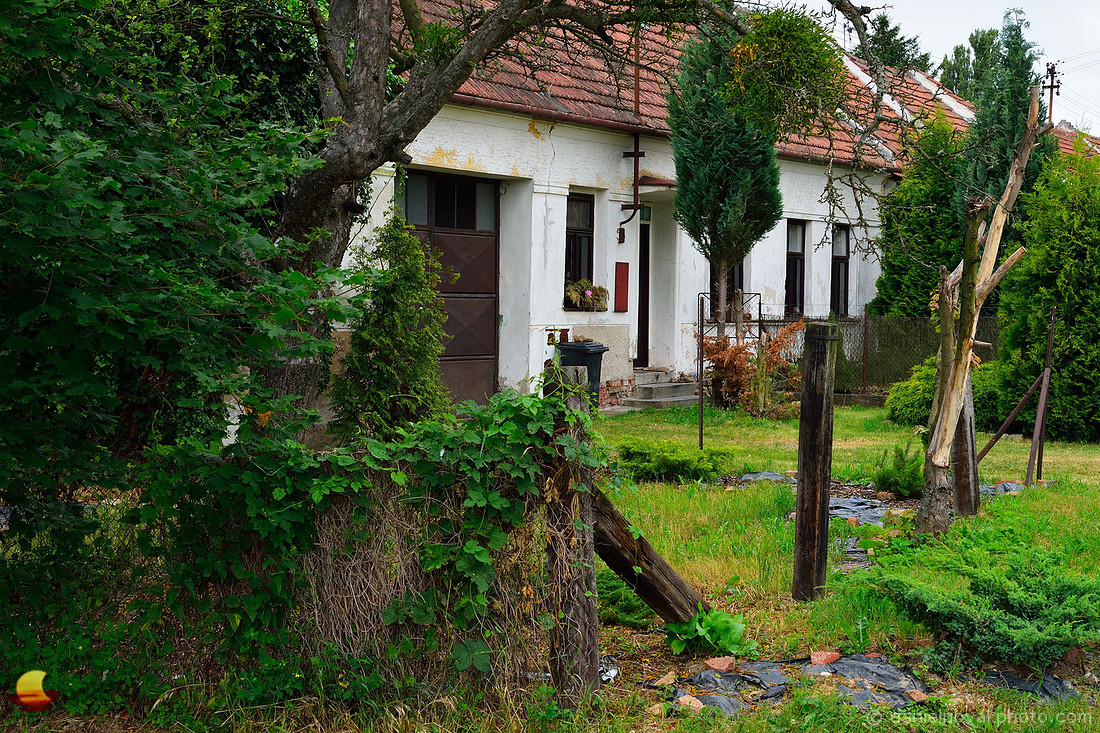 A Rural HouseSouthern Moravia, Czech Republic
Enjoy the beauty that surrounds you (#etbtsy)!
Do you enjoy reading my photography blog? Would you like to get more special content from me reserved for the subscribers to my quarterly newsletter? Please, register by creating an account on my website - just follow the Login link at the top of the page. Would you like to see more travel photographs? Visit my Travel Photography gallery and enjoy! Please, let me know if you have any questions about any photo products offered, or not offered, I will be happy to help!
Using my links to do your shopping keeps me sharing more photographs and writing the stories behind them and costs you nothing. You can also use the Amazon search box in bottom left for anything not mentioned here. I truly appreciate each purchase, no matter how large, no matter how small. Thank you!
Night over Canalside, Buffalo, NY
 The Naval & Military Park at NightCanalside, Buffalo, NY
This is a Part II for Buffalo, NY - The City of Light posted back in December. It was a beautiful even if a bit chilly winter night, an anomaly this season, and all of the waterfront illumination came to life. I photographed this area before in daylight and at dusk but did not have a night shot yet. At night, many distractions disappear and one's composition can be quite different. I really liked this view showing off Buffalo's Canalside, the city's new waterfront that continues to change. The boardwalk, the new pedestrian bridge leading to the Naval & Military Park and the Liberty Hound restaurant, and finally the prominent USS Little Rock on the left.
From there, I made a wide loop around the rest of the boardwalk working my way towards the ice rink. It was clear the cold night had an impact there too with just a handful of skaters on the ice. I am sure they enjoyed the wide open space though.
Instead of trying to get a clear shot of the ice with the new additions to Buffalo high rise buildings in the background I actually preferred the view you see here shot through the side of one of the Canalside pedestrian bridges. I liked how that further highlighted the night illumination.
 The Ice at Canalside at NightBuffalo, NY
The Ice at Canalside at Night, Buffalo, NY
Enjoy the beauty that surrounds you! (#etbtsy)!
Do you en joy reading my photography blog? Would you like to get more special content from me reserved for the subscribers to my quarterly newsletter? Please, register by creating an account on my website - just follow the Login link at the top of the page. Would you like to see more photographs from Buffalo and Western New York? Visit my Buffalo Cityscapes and Buffalo & Western New York Landscapes and enjoy! Please, let me know if you have any questions about any photo products offered, or not offered, I will be happy to help!
Using my links to do your shopping keeps me sharing more photographs and writing the stories behind them and costs you nothing. You can also use the Amazon search box in bottom left for anything not mentioned here. I truly appreciate each purchase, no matter how large, no matter how small. Thank you!
The Simple Pleasures of Road Tripping
Yep, just a road, a pole, a big sky, and some clouds and I am happy. Yes, even after visiting gems like Yellowstone, Tetons, Glacier, Banff, Yoho, Jasper, a simple scene like this can take my breath away. The simple pleasures of road tripping, never a dull moment as long as you can keep your eyes open ;-)
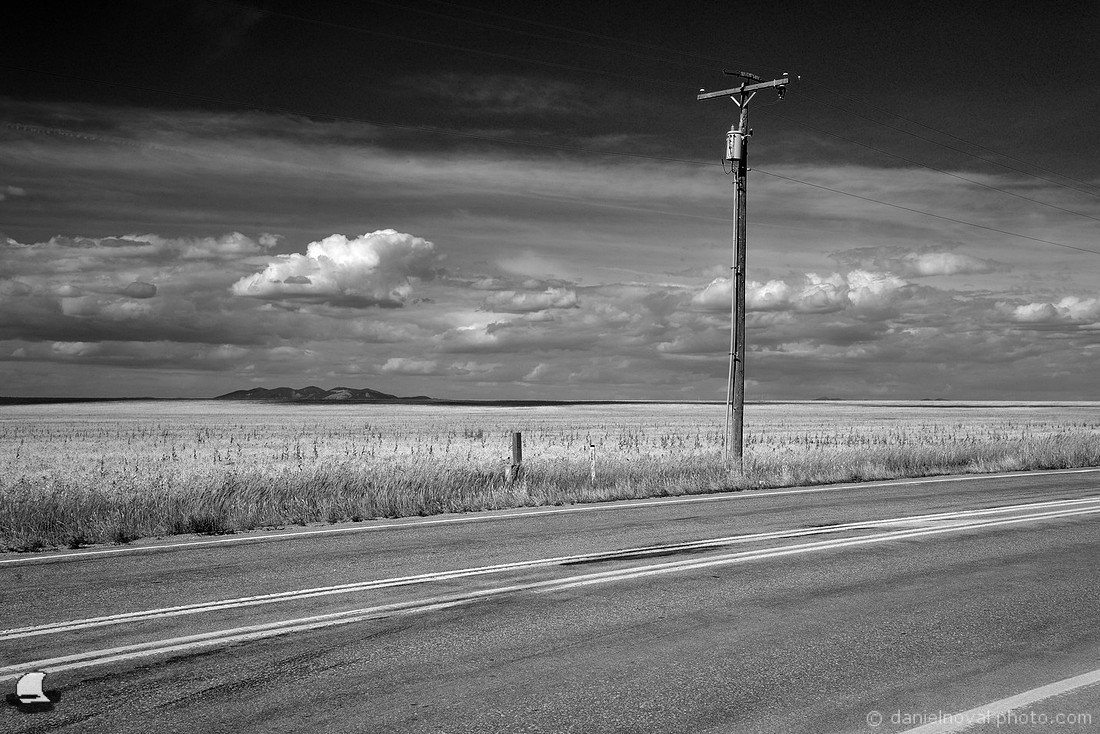 The Simple Pleasures of Road TrippingSomewhere by Moccasin, Montana
The Simple Pleasures of Road Tripping, Somewhere by Moccasin, Montana
#etbtsy (Enjoy The Beauty That Surrounds You)!
Do you enjoy reading my photography blog? Would you like to get more special content from me reserved for the subscribers to my quarterly newsletter? Please, register by creating an account on my website - just follow the Login link at the top of the page. Would you like to see more travel photographs? Visit my Travel Photography gallery or the On the Road Collection and enjoy! Please, let me know if you have any questions about any photo products offered, or not offered, I will be happy to help!
Using my links to do your shopping keeps me sharing more photographs and writing the stories behind them and costs you nothing. You can also use the Amazon search box in bottom left for anything not mentioned here. I truly appreciate each purchase, no matter how large, no matter how small. Thank you!
Analog (Film) Photography
 Nikon FEFilm SLR
It all started as an idea a while back, just this little bug somewhere in the back of my mind. And as you might imagine, the bug was growing and bugging me more and more. Last time I used a camera with a black and white film that I then developed myself was ... a while back. Couple decades and some years on top. I still have the negatives. Found them stashed away almost two years ago and ran them through a cheap flatbed scanner, bringing back really old memories. I guess that experience fed the bug quite substantially.
So why not I thought, looked around a bit, and decided to get an old Nikon FE. Simple, light, yet powerful and with a built-in meter - of course an analog one, a needle moving up and down in the viewfinder. I really wanted to keep my film rig simple so I added an older 24 mm prime lens, not a zoom. More often than not I shoot wide anyway so why not simplify that part too. The small size and light weight being a nice side benefit.
 Swannie HouseFirst Ward, Buffalo, NY
Even though I knew from the start this whole operation was aimed squarely and shooting black and white film I quickly wanted to test the new camera out. After all, it was used and came in through eBay. I also already knew the seller was not all that accurate stating the camera was in a perfect order. The battery tester on the back had a lever broken off, however, it was still usable. And the viewfinder was missing the screw in glass, a component easily bought but pretty pricey considering the price of the whole camera. Anyway, I found several really old (12 years?) rolls of Fujicolor HQ 200 in the case with an old film point and shoot, loaded one into the camera and headed out to see how the camera, meter, and lens would measure up. Very fun time with a significantly simplified workflow compared to my normal process. Out of all the simplifications one stood out - no LCD peeping after any of my shots! Yep, take a meter reading, asses any necessary adjustments, set the exposure, click, done, move on. I still worked the scenes in front of me looking for interesting angles but found myself shooting less until I really felt I found something worth occupying one out of the 24 frames I had available.
I dedicated this roll of color film to urban photography around Buffalo's First Ward, and in Orchard Park and Hamburg. You can see a sample of the Swannie House here. Since I did not intend getting into developing color film myself I searched for a place that would develop the film for me. Most places no longer do that locally but mail it out. Turnaround? One to two weeks. I found a local Rite Aid store on Hamburg Village Square that still had a machine of their own and would develop my film. However, I got a call from them the next day that the machine was broken and they'd be waiting for service for a bit ... In the end, Delaware Camera (2635 Delaware Ave, Buffalo, NY 14216) developed the film for me while I waited (for about 30 minutes). They did not insist on making prints either, and if I remember it right, the price was around three bucks! Thank you! Seeing images on the developed film was so encouraging! It seemed all was in order and ready for the next step.
 Ilford Delta 100Black & White Film and Equipment
Right from the first thought about this endeavor I knew that I did not want labs involved in my black and white film development. The magic of pulling the film out of the development tank, hanging it to dry, and seeing the negative frames for the first time was something I wanted to experience myself, not leave it to a lab technician. Now that I had a functioning camera and a lens it was time for getting some film and the necessary equipment for getting it developed afterwards. Couple online orders took care of that and I had my Ilford Delta 100 ready in the camera and some basic equipment in the basement.
 Kodak XTOLB&W Film Developer
This time, I went with 36-exposure rolls to get more out of each development session but I can already see the advantages of 24-roll film. I know, in the digital age it may seem strange not being able to quickly finish the 36 exposures but it took a while and required patience. I managed to visit quite a few places around town and had a blast revisiting some of my old locations trying to capture them in a whole new light - film vs. digital and black and white vs. my more usual color. That alone made the experience worth it!
It was a great opportunity to spend more time seeing and thinking rather than shooting. Only a few compositions made it on the film and for each I thought about the exposure, about where I cared to retain detail and where not. No matrix metering, no immediate feedback on the LCD, nor a histogram showing a detailed analysis for each color channel. Despite the lack of feedback, or maybe because of it, all so much simpler.
 Developing EquipmentThe Basement Lab
After several photo outings I could not wind the film any more and it was time to see the results. I pulled out the earlier purchased chemicals and equipment, mixed everything up, and gave it enough time to dissolve. In the meantime, I locked myself up in an almost light proof room in the basement (it will need some work to make it 100%) after dark and worked on getting the film on the spool and into the tank. As I said at the beginning, it had been a while! And the spools were different and I must admit it was a tiny bit of a struggle. My first attempt failed and I had to open the spool up, remove the film, and start over, all of that in a pitch black darkness. But I was not going to give up! Eventually, the film was in and I felt somewhat confident it was wound right and the chemicals would get to all surfaces.
 Developed FilmHanging to Dry
Once the spools and the film were locked in the tank, lights came back on and I got all the liquids to the right temperatures. It's actually pretty amazing how quickly everything goes after this prep work. Thirty minutes after pouring the developer in I was able to pull the film out of the tank and hang it to dry. And since the process keeps you pretty busy for the most part those thirty minute blew by quickly!
Again, as with the first color roll, I was very happy to see photographs on the film. It did not turn out black, nor transparent, the photos were clearly there and I could easily tell what each one was of!
At this stage I was not planning on darkroom printing. As such, buying a little better scanner was also involved as a preparation for this project. I had a chance to get some experience with it thanks to the earlier Fujicolor roll. And since color had its extra challenges I figured practicing on color and doing black and white later should simplify things.
At first, I struggled a bit. Getting highlight details was more difficult than I had expected. First, I suspected overexposure but could not understand why since the color film turned out great. After some online research I determined a slight over-development was the problem. The basement was cold and I thought the developer would lose temperature quicker than it did and I tried to compensate by adding a tiny bit of extra development time. Lesson learned. Fortunately, the scanner did offer some flexibility dealing with that problem and all of my images scanned great, even if they had a stronger contrast.
So what was my first black and white film photo?
 South Grand Island Bridge on FilmNikon FE, Ilford Delta 100
South Grand Island Bridge on Black and White Film, Nikon FE, Ilford Delta 100 (timelessbuffalo.com)
And yes, as you might suspect based on my earlier post Timeless Buffalo, selected photos are going to be available there for your viewing pleasure. There is now a whole gallery dedicated to black and white photos shot on film.
Enjoy the beauty that surrounds you! (#etbtsy)!
Do you enjoy reading my photography blog? Would you like to get more special content from me reserved for the subscribers to my quarterly newsletter? Please, register by creating an account on my website - just follow the Login link at the top of the page. Would you like to see more photographs from Buffalo and Western New York? Visit my Buffalo Cityscapes and Buffalo & Western New York Landscapes and enjoy! Please, let me know if you have any questions about any photo products offered, or not offered, I will be happy to help!
Using my links to do your shopping keeps me sharing more photographs and writing the stories behind them and costs you nothing. You can also use the Amazon search box in bottom left for anything not mentioned here. I truly appreciate each purchase, no matter how large, no matter how small. Thank you!