
Welcome to my blog! Read about photography, film photography in 35mm, medium, and large formats, pinhole photography, about darkroom printing, alternative photographic processes, and more. Thank you for visiting!
Dirty Windows, or Commercial Airline Photography


On a recent flight to Florida, I found myself above clouds just as the sun headed down by luck, no planning for that involved. I also happened to be on the right side of the plane (well, this time the right side was the left side). At first, I was just looking out enjoying a scene seen many times before. But as the clouds started rolling around in varying formations and the sun was lower and lower, I could not resist!
To heck with dirt, and scratches, and thousands of other photos, this is what I am seeing and experiencing!

Here, I really liked the light peeking from behind clouds that the plane was about to submerge into.

And here, the sun went crazy and flooded the sky with quite a dose of color!
Oh, and from my experience, this is one time when you should not reach for the polarizer. Not only does it rob you of light, it also created weird color effects combined with the thick airplane windows.
Have fun doing what you like doing no matter what others tell you!
Planned Surprise in Coral Cove Park, Florida
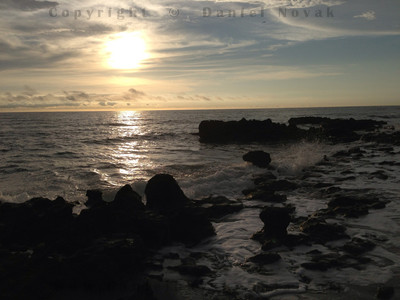 After visiting southern Florida several times I grew to expect straight sandy beaches there with little variety and foreground elements. Shells can provide some foreground interest, especially on the Gulf side, specifically on Marco Island. There are also manmade structures like piers, but those are not natural and have become somewhat of a cliche.
For my most recent trip I stayed a bit more north in the Palm Beach Shores area to explore new places. And while researching the location online ahead of the trip I was pleasantly surprise to find locations like Blowing Rocks Preserve and Coral Cove Park. The rocky Anastasia limestone shoreline there reminded me of the American West Coast or even Hawaii more than of what I had known from Florida.
The surprise repeated when it materialized on one of my sunrise photo ops. For now, I am sharing just an iPhone photo here but am sure I will follow up with some real camera photos soon and also add something to my seascapes photo gallery.
Have fun exploring!
Indoor Projects - Shells
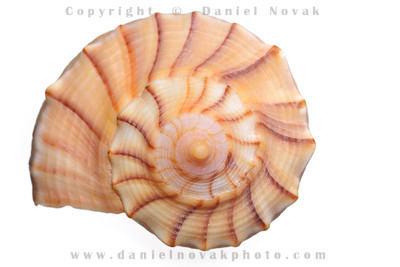 Another home project as I did not find my way out of the door. I decided to retake some shots of shells we brought back from Marco Island, FL a while back. I figured it was time to see how the D600 handles extension tubes. I put the 50mm f/1.8 lens on a Kenko extension tube and went for it.
One thing I did not do was realize that my blog has a black background theme and as such I should have shot both on white and on black. Oh well, looks like another indoor photo project in making.
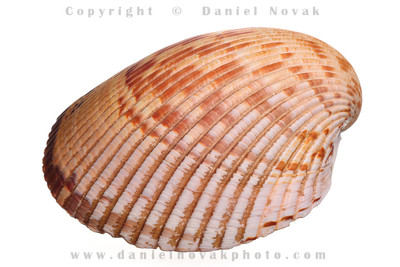 So I went back to the good and tried method of focusing manually as close as possible through the finder and then moving the shell back and forth to fine tune the focus. I still found the optical finder better for this. It felt like the LCD motion was not smooth enough to clearly see the textures come in and out of focus.
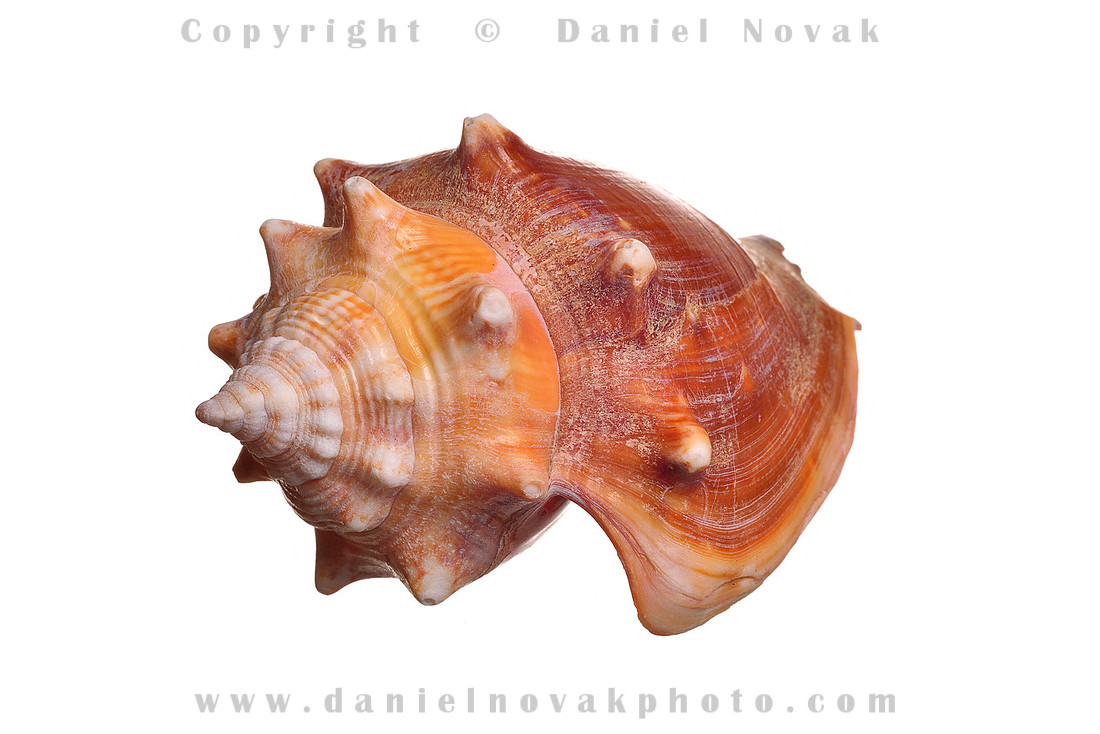
- Nikon D600
- Nikkor 50mm f/1.8 (or the newer AF-S version)
- Kenko extension tube set
- 2 x SB-600 (now replaced with Nikon SB-700)
- 3 section Light / Flash stand with a shoe mount flash + umbrella bracket
- Small photo umbrella
- Manfrotto tripod (055MF3) and head (496RC2)
- 20" x 30" white illustration board curved and clamped to a chair
- Picture frame glass
- Two stacks of books to sit the glass on
Using my links to buy your equipment keeps me going and costs you nothing. You can also use the Amazon search box in bottom left for anything not mentioned here. Thank you!
The Colden Falls
 This is another example I could throw into my Do You Know Your Back Yard post. Being only three and a half miles from the Kissing Bridge Ski Resort, hundreds of people pass by it daily in winter. But how many actually know about it? From my experience, not many at all.
 This beautiful small waterfall on West Branch Cazenovia Creek is right in the center of the Village of Colden. However, you cannot see it driving on Route 240 south. And that is the road so many people take, especially in winter, since it takes them to the Kissing Bridge Ski Resort. Driving south, the waterfall is on your left as you pass the center of Colden.
You can get a quick and easy view of the waterfall if you make a left on Heath Road and look to your right from the bridge over the Cazenovia Creek.
In winter, this is a popular area for skiers, in summer, there are lots of bicyclists. The area offers some outstanding biking opportunities with varied levels of difficulty based on your route choice. It is possible to go almost around the hills and encounter a moderate level of climb, or if you dare you can cut right across and get quite a workout!
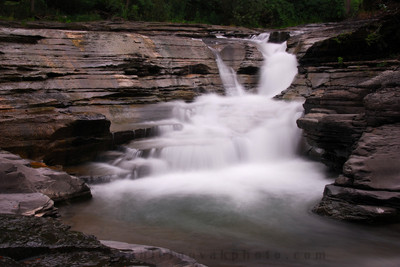 One thing I enjoyed at this location was the variety of angles one can get. Some waterfalls look great head on, some from the left, some from the right, some are in narrow gorges where different angles are very limited. This waterfall seems to look great from all angles and the creek is wide enough here to provide shooting flexibility.
The creek above the waterfall is wide with several small water drops that offer a nice variety of photographs too, whether wide angles or close ups. In the opening panorama here I zoomed in and took several images I stitched later to show one row of these drops.
In Western New York, it is not just the water and waterfalls that offer nice views and opportunity for photographs. I also like the layers of shale rock the creeks flow over. Different textures, patterns, and colors also offer nice opportunities to explore and photograph. Some creeks are dried up in the fall but the dry creek beds still look great with the autumn foliage lining the rocky sides.

Have fun waterfalling!
Indoor Projects - Aquarium Photography
In a way, this now starts a sequel. A while back I posted Indoor Projects - Take Notes. Coming to think of this just born idea I kind of like it and who knows, maybe the winter about to start will bring whole bunch of other home photo projects that do not require parkas, hats, and gloves.
 I could not motivate myself to head out today to check out the first real snow dusting of the season. So instead a home project it was. I tried this many years back with my Nikon D200 + Nikkor 80-400 mm + Kenko extension tube combo. I was curious what I could get out of the D600.
The theory has it that the APS-sized sensor crop factor is better for telephoto use since one benefits from the magnification. Well, with the D200 being 10.2 MP compared to the 24 MP of the D600, I can do the cropping myself and still have more pixels left.
So I repeated the set up with two SB-600 flashes on either side of the aquarium fired remotely by the built-in flash, both hitting the side glass, not the front, both sloping down a little, and both manually zoomed to 50 mm. And both set to manual exposure and dialed to 1/8th of power. Manual is the only way to go, otherwise the pre-flashes guarantee a missed moment.
Then, the D600 + Nikkor 80-400mm + 36mm Kenko extension tube to allow for closer focusing, mounted on a Manfrotto monopod. The camera was also on manual, as the flashes. The maximum flash sync. of the D600 is 1/200 sec, unlike the 1/250 sec. of the D200. But at 1/8 power the flash duration should be enough to freeze even the motion of an erratically moving clownfish. I varied the f-stop to balance enough depth of field for the fish and not enough to get the back glass in focus.
For focusing, I used the single point 3D focus tracking today, unlike the last aquarium shoot when I focused manually. While it was a bit of a challenge to watch the focus point jump around trying to follow the erratic fish, the camera did great for the most part and it was somewhat easy to tell when it lost the fish and I needed to aim and start over.

By the way, despite having cleaned the aquarium just couple days ago, it's unreal how much detailed photographs like this pick up! Thanks to cloning, I was able to clean most of it up but it may have been more work than scrubbing the glass one more time.
The first photo is about 90% of the original frame down-sampled for posting here. The second photo is a crop at 100% of the size. I think it all worked pretty well given I have not even used a macro lens.
More photos coming once I "clean the glass" :-)
Have fun shooting no matter what the weather brings!
Equipment used:
- Nikon D600 manual exposure, continuous single-point 3d focus tracking
- Nikkor 80 - 400mm zoom
- Kenko extension tube (36mm)
- 2 x Nikon SB-600 (now replaced with the newer and cheaper Nikon SB-700) flash on either side of the aquarium at 1/8 manual power
- Manfrotto monopod
- Manfrotto Swiwel Tilt Head (replaced with 234RC)
Using my links to buy your equipment keeps me going and costs you nothing. You can also use the Amazon search box in bottom left for anything not mentioned here. Thank you!